I was so excited to start this project in the new year. We had had the red, black & grey dandelion wallpaper up for a few years now (what were we thinking?!), and I couldn’t wait to get rid of it.
The best bit is you don’t need to spend time steaming off the wallpaper, it can stay there underneath!
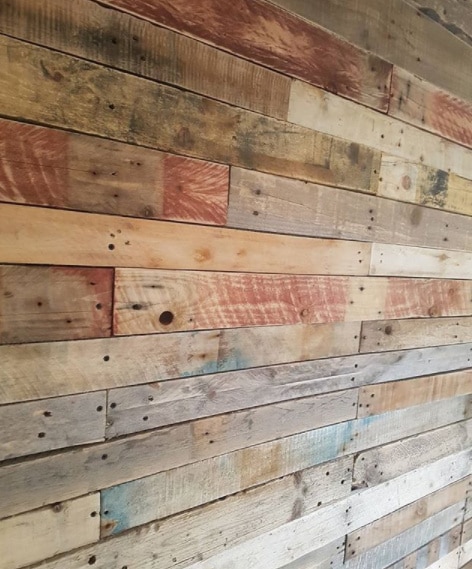
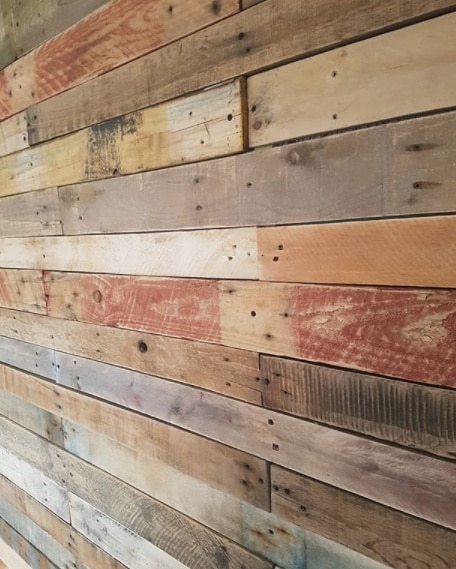
To start with, we collected various pallets from here and there, in all sorts of different shades of colour. The colours in some of them are what I love the most. A lot of the pallets were quite aged but this didn’t matter, it all adds to the overall rustic effect. I like to think that each plank tells a story of where it has been, in most cases they have probably traveled the world.
Most DIY stores will have plenty of unwanted pallets lying around that will give them to you for free if you ask nicely. We found a store that was going to be burning a big pile of them, so it did them a favour getting rid of some.
The pallets need to be broken down… this was quite a lengthy process and it’s good to have a man around for this job! We used a crowbar to prize the planks off, carefully without splitting them. Each plank has to be de-nailed, and then sanded. It is best to use an electric sander, which gets the job done a lot quicker and also does a better job. Some of the grains of wood created a striped effect when they were sanded.
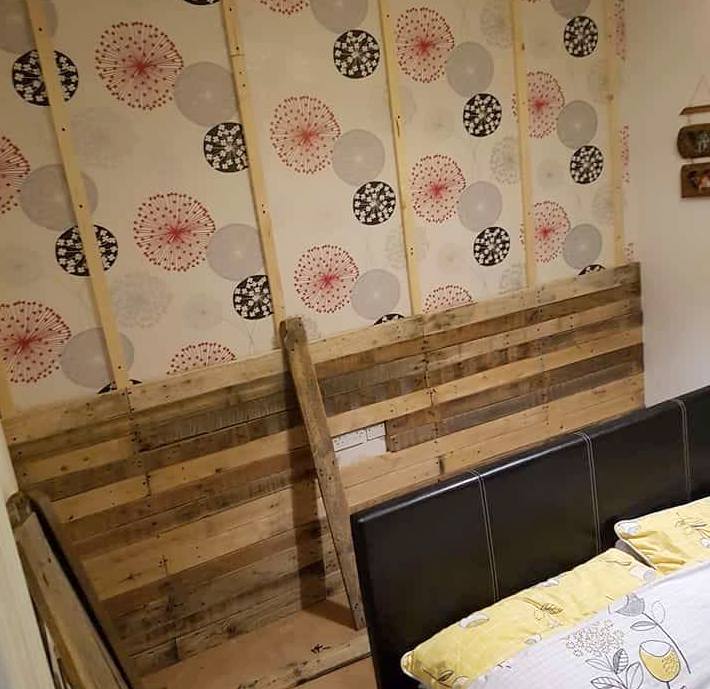
We had a builder friend come and measure the wall to make sure it was level, before fixing in the vertical batons. These are what the pallet planks are screwed onto. You should be careful not to screw the batons into any electrical wiring from sockets.
Before screwing the pallet planks onto the batons, make sure you have enough planks in the same width to fill a complete row. It is easier to cut them to size with a saw first, and then screw a whole row on. We started from the bottom and worked upwards, and used black screws. Repeat with rows of planks the same width as you work your way up. It doesn’t matter if some are thicker than others, it adds to the character (see below).
You might need to measure the gap at the top when you have about 3 rows left, and work out which sized widths you are going to need.
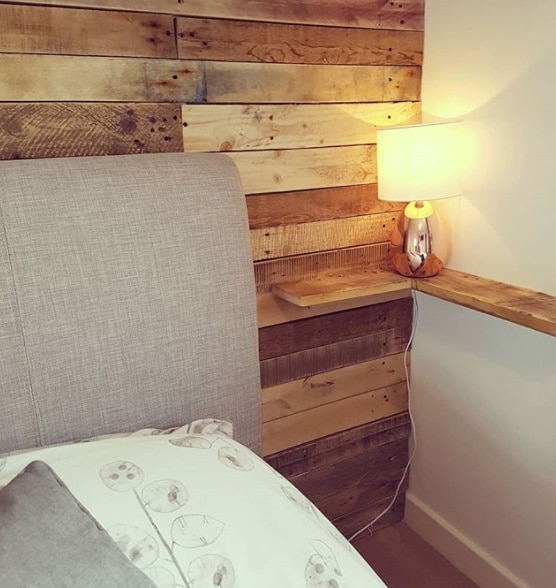
Once finished, it really gives the room a sense of character. I love it!
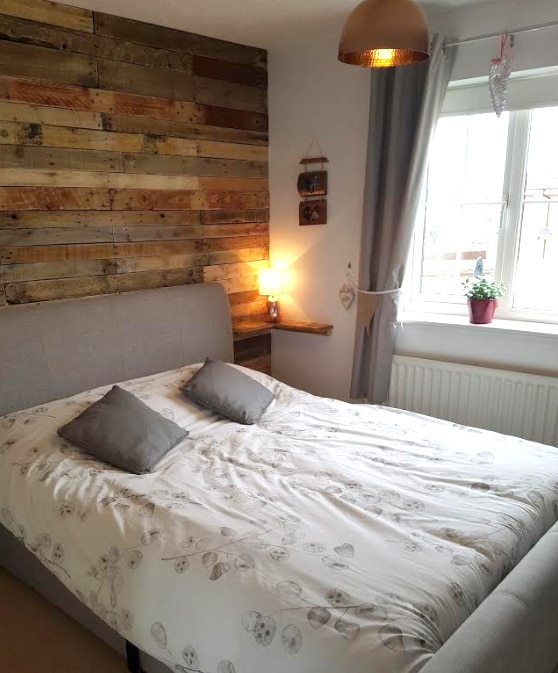
We also put up a little pallet wall ‘floating’ shelf by fixing batons to the walls, and then screwing planks directly onto them. It is perfect for sitting my cup of tea on in the mornings!
After completing the pallet wall, there were a lot of scrap pieces of wood left. I knew they were too nice to get rid of, and kept them in my studio for a few weeks.
While I was working around them, I thought about several ways in which they could be put to good use, and came up with creating lots of mixed media wall hangings using some scraps of ceramic tests I had lying around.
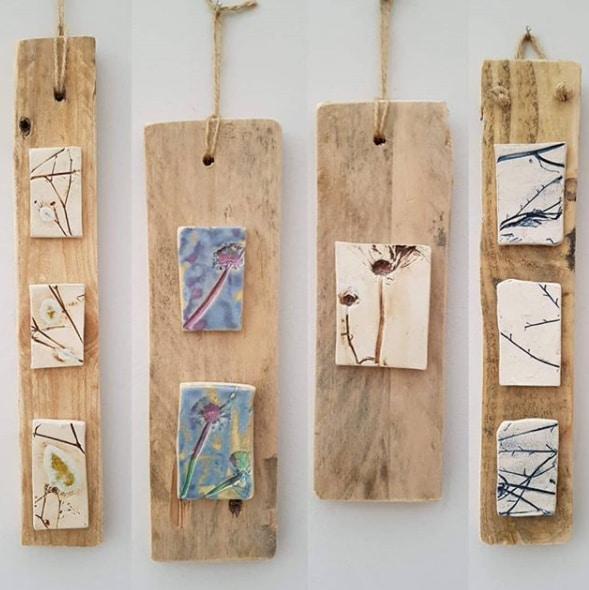
You can purchase the one-off mixed media wall hangings by clicking the link. Hope you like them!
